部署 Hexo 博客到云服务器
使用 Nginx Web 服务器托管即可
总体思路:
- 通过 git 将本地 hexo 生成的博客静态资源上传至服务器
- 修改 nginx 配置,让访问指向博客静态资源所在的目录
云服务器配置
安装必要程序
我服务器安装的 Linux 发行版为 CentOS
yum install curl-devel expat-devel gettext-devel openssl-devel zlib-devel安装依赖库yum install gcc perl-ExtUtils-MakeMaker package安装编译工具yum install git nginx安装 git 和 nginx
Nginx:一款轻量级、高性能的 Web 服务器程序
service nginx start启动 Nginx
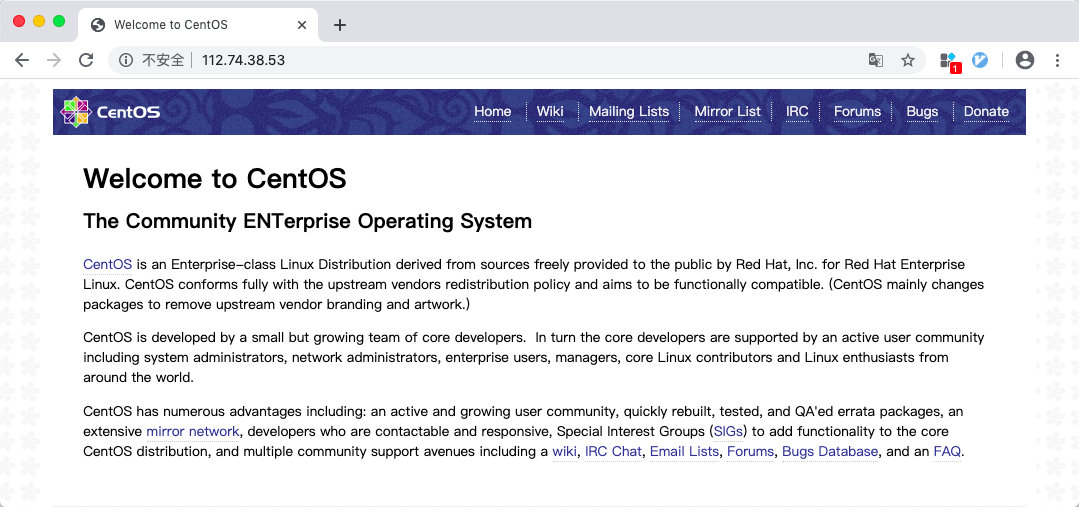
在浏览器中打开服务器 ip 地址 测试 Nginx 是否成功启动,或者 wget http://127.0.0.1 进行测试:

创建 git 仓库
创建并修改目录的所有权和用户权限:
1 | mkdir /home/git/ |
创建一个裸的 git 仓库:
1 | cd /home/git/ |
创建一个新的 git 钩子,用于自动部署:
1 | vim /home/git/hexoBlog.git/hooks/post-receive |
编辑添加:
1 | #!/bin/bash |
修改文件权限,使得其可执行:
1 | chmod +x /home/git/hexoBlog.git/hooks/post-receive |
配置 Nginx 托管文件目录
创建 /home/hexoBlog 目录,用于存放博客静态资源:
1 | mkdir /home/hexoBlog/ |
nginx -t 查看 Nginx 配置文件位置:
1 | [root@aliyun ~]# nginx -t |
vim /etc/nginx/nginx.conf 编辑配置文件:

- 将其中的 root 值改为
/home/hexoBlog(刚才创建的托管仓库目录) - 检查配置文件是否准确 `./sbin/nginx -t``
- ``service nginx restart` 重启 Nginx 服务
访问服务器上面的静态文件

把文件上传到服务器后配置文件地址,即可通过 [IP 地址]/guitar/2019.12.17.mp4 访问该文件
这里的 root 指的是上面配置的 /home/hexoBlog
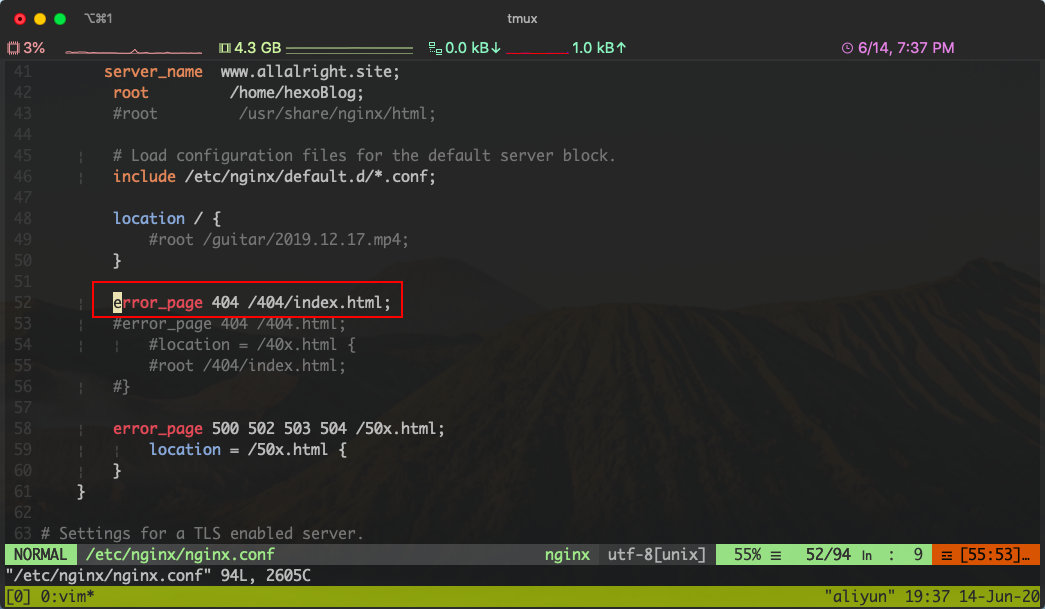
配置 404 页面

本地主机配置
编辑 hexo 站点配置文件 _config.yml

repo: root@[服务器 IP 地址]:/home/git/hexoBlog
进入 hexo 博客目录:
1 | hexo clean |
部署成功,打开服务器公网 IP 即可访问博客了